This guide is written for users in the USA and Canada and is suitable for beginners and advanced users alike. Whether you want to upgrade to Windows 11 Home or Windows 11 Pro, everything you need is right here.
A PC running Windows 10 version 2004 or later. Older versions of Windows such as Windows 7 or Windows 8 cannot upgrade directly to Windows 11 and require a clean install.
A stable internet connection. The upgrade files are several gigabytes in size, so a wired or strong Wi-Fi connection is recommended.
At least 64 GB of free storage space on your main drive. The actual Windows 11 installation requires around 20 to 27 GB, but you need extra space for the upgrade process itself.
At least 4 GB of RAM. Microsoft's minimum requirement is 4 GB, though 8 GB or more is strongly recommended for a smooth experience.
A backed-up copy of your important files. Upgrades are generally safe, but it is always smart to back up your documents, photos, and other data before making any major changes to your system.
Your Windows 11 key or access to a licensed Windows 10 copy. If your PC already has a genuine Windows 10 license, the upgrade to Windows 11 is completely free and your activation carries over automatically.
Microsoft has specific hardware requirements for Windows 11 that are stricter than previous versions of Windows. Before you attempt any Windows 11 download, confirm your PC meets these requirements.
Processor: 1 GHz or faster with at least 2 cores on a compatible 64-bit processor.
Firmware: UEFI with Secure Boot capability.
TPM: Trusted Platform Module version 2.0.
Display: 720p resolution or higher, at least 9 inches diagonally.
Internet: Required for setup on Windows 11 Home edition.
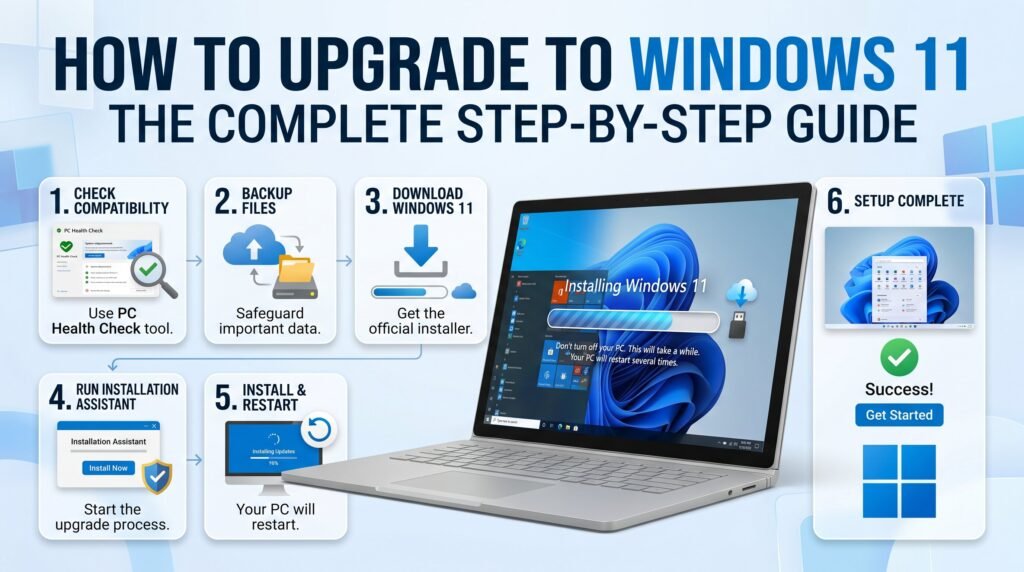
The easiest way to check compatibility is to use the PC Health Check app from Microsoft.
Step 1: Go to the official Microsoft website and search for PC Health Check app.
Step 2: Download and install the app on your current Windows 10 PC.
Step 3: Open the app and click Check now.
Step 4: The app will tell you whether your PC can run Windows 11 and will flag any components that do not meet the requirements.
If your PC passes the check, you are ready to upgrade. If it fails, the most common reasons are TPM 2.0 being disabled in BIOS or Secure Boot being turned off. Both of these can often be enabled in your PC or motherboard BIOS settings without any hardware purchase.
Step 1: Restart your PC and press the BIOS key during startup. This is usually Delete, F2, or F10 depending on your motherboard brand.
Step 2: Look for a setting called TPM, PTT (Intel), or fTPM (AMD) under the Security or Advanced tab.
Step 3: Enable it and save your changes.
Step 4: Restart your PC and run the PC Health Check app again.
Best for: Most users who want a simple, automatic upgrade without downloading anything separately.
If your PC is compatible, Microsoft will eventually push the Windows 11 upgrade through Windows Update automatically. However, you can also check for it manually right now.
Step 1: Click the Start button and open Settings.
Step 2: Go to Update and Security, then click Windows Update.
Step 3: Click Check for updates.
Step 4: If Windows 11 is available for your device, you will see a banner that says Windows 11 is ready and it is free.
Step 5: Click Download and install.
Step 6: Wait for the download to complete. This may take 30 minutes to over an hour depending on your internet speed.
Step 7: When prompted, click Restart now to complete the installation.
Step 8: Your PC will restart several times during the process. This is completely normal.
Step 9: Once finished, you will be greeted by the Windows 11 setup screen.
Important: This method upgrades your PC while keeping all your existing files, apps, and settings intact. You do not need to enter a new Windows 11 key because your existing Windows 10 activation transfers automatically.
Best for: Users who want to upgrade now without waiting for Windows Update to offer it.
If Windows Update is not yet showing the Windows 11 upgrade option on your PC, you can force the upgrade using the official Windows 11 Installation Assistant from Microsoft.
Step 1: Visit the official Microsoft Windows 11 download page at microsoft.com/en-us/software-download/windows11
Step 2: Under the section called Windows 11 Installation Assistant, click Download Now.
Step 3: Run the downloaded file. You may need to accept a User Account Control prompt.
Step 4: The Installation Assistant will check your PC compatibility.
Step 5: If your PC qualifies, click Accept and install.
Step 6: The tool will download Windows 11 and begin the upgrade process automatically.
Step 7: Follow any on-screen instructions and allow your PC to restart when prompted.
Step 8: The installation will go through several phases and multiple restarts. Do not turn off your computer during this time.
This method keeps your files and apps just like the Windows Update method. Your Windows 11 activation is handled automatically if you had a genuine Windows 10 license.
Best for: Advanced users who want a fresh start, are building a new PC, or are replacing a failed installation.
A Windows 11 ISO is a complete disk image of the Windows 11 operating system. You can use it to do a clean installation, which wipes your drive and installs a brand new copy of Windows 11 from scratch.
Warning: A clean install will delete everything on your drive. Back up all important files before proceeding.
Step 1: Go to the official Microsoft Windows 11 download page at microsoft.com/en-us/software-download/windows11
Step 2: Scroll down to the section called Download Windows 11 Disk Image (ISO).
Step 3: Select Windows 11 from the dropdown menu and click Download.
Step 4: Select your language and click Confirm.
Step 5: Click the 64-bit Download button. The Windows 11 ISO file is approximately 5 to 6 GB.
Step 1: Download a tool called Rufus from rufus.ie. This is a free and trusted tool for creating bootable USB drives.
Step 2: Insert a USB drive with at least 8 GB of storage. Note that all data on the USB will be erased.
Step 3: Open Rufus and select your USB drive.
Step 4: Click Select and choose your downloaded Windows 11 ISO file.
Step 5: Under Partition scheme, select GPT for modern UEFI systems.
Step 6: Click Start and wait for Rufus to create the bootable USB.
Step 1: Insert the bootable USB into the PC you want to install Windows 11 on.
Step 2: Restart the PC and boot from the USB. You may need to press F12, F11, or Esc to access the boot menu.
Step 3: Follow the Windows 11 setup wizard.
Step 4: Choose your language, region, and keyboard layout.
Step 5: Click Install now.
Step 6: Enter your Windows 11 key when prompted. If you are upgrading a PC that already had a genuine Windows license, you can click I don't have a product key and Windows will activate automatically after connecting to the internet.
Step 7: Select the drive partition to install Windows 11 on and click Next.
Step 8: Wait for the installation to complete. Your PC will restart several times.
Step 9: Complete the out-of-box setup including region, account, and privacy settings.
Best for: Users who want to upgrade their current PC or create a bootable USB to install Windows 11 on multiple computers.
The Windows 11 Media Creation Tool is an official Microsoft utility that simplifies the process of downloading Windows 11 and creating installation media. It is the recommended method for creating a bootable USB drive without needing third-party software like Rufus.
Step 1: Go to the official Microsoft Windows 11 download page.
Step 2: Under the section called Create Windows 11 Installation Media, click Download Now.
Step 3: Run the Media Creation Tool. Accept the license terms.
Step 4: On the next screen, choose what you want to do:
Option A: Upgrade this PC now. This upgrades your current computer to Windows 11 while keeping your files and apps.
Option B: Create installation media for another PC. This lets you create a bootable USB or download an ISO file.
Step 5: for Option B: Select your language, edition, and architecture (64-bit).
Step 6: Choose USB flash drive to create a bootable USB, or choose ISO file to save the Windows 11 ISO to your computer.
Step 7: If you chose USB, select your USB drive and click Next. The tool will download Windows 11 and write it to the USB automatically.
Step 8: When finished, your USB is ready to use for installing Windows 11 on any compatible PC.
The Windows 11 Media Creation Tool is one of the most reliable ways to get a clean, official copy of Windows 11 without any third-party involvement.
When downloading Windows 11 or entering a Windows 11 key, you will be asked which edition you want. Here is a simple breakdown to help you decide.
Windows 11 Pro includes everything in Windows 11 Home plus additional features aimed at business users and power users. These include BitLocker device encryption, Remote Desktop, Hyper-V virtualization, Windows Sandbox, and the ability to join a corporate domain or Azure Active Directory. Windows 11 Pro is the better choice if you work from home, manage business data, or need advanced security and remote access features.
If you already have a Windows 10 Home license, you will upgrade to Windows 11 Home for free. If you have a Windows 10 Pro license, you will upgrade to Windows 11 Pro for free. If you want to upgrade from Windows 11 Home to Windows 11 Pro, you can purchase a Windows 11 key directly from Microsoft or an authorized retailer.
A Windows 11 key is a 25-character product key used to activate your copy of Windows 11. It looks like this: XXXXX-XXXXX-XXXXX-XXXXX-XXXXX
Do you need to buy a Windows 11 key? In most cases, no. If you are upgrading from a genuine Windows 10 PC, your activation carries over automatically and you do not need to enter any key. Windows 11 will activate itself once connected to the internet by linking to your Microsoft account or your hardware ID.
You will need to purchase or enter a Windows 11 key in these situations: You are doing a clean install on a brand new PC that never had Windows activated. You are upgrading from Windows 11 Home to Windows 11 Pro. Your previous activation is not being recognized after a major hardware change.
Where to buy a legitimate Windows 11 key: Always purchase directly from Microsoft at microsoft.com or from authorized retailers. Avoid third-party websites selling unusually cheap keys, as many of these are either stolen, recycled, or invalid and will fail activation.
This usually means TPM 2.0 or Secure Boot is disabled. Enter your BIOS settings and enable both. On Intel systems look for PTT under Advanced settings. On AMD systems look for fTPM under AMD CBS settings.
This often happens due to driver conflicts or insufficient disk space. Free up at least 20 GB of space, update your drivers, and try again. You can also try the upgrade using the Windows 11 Installation Assistant instead of Windows Update.
Some users have reported that the Windows 11 KB5077181 cumulative update causes the upgrade or update process to stall or roll back. If you encounter this issue, try the following steps. First, go to Settings then Windows Update then Update History then Uninstall Updates and remove the KB5077181 update. Then restart your PC and try the upgrade again. Alternatively, use the Windows 11 ISO or Windows 11 Media Creation Tool to bypass the Windows Update process entirely and upgrade directly.
Make sure you are entering a valid Windows 11 key that matches the edition you are installing. A Windows 11 Home key will not activate Windows 11 Pro and vice versa. If you are upgrading from Windows 10, skip the key entry screen and let Windows activate automatically online.
Windows 11 Home requires an internet connection and a Microsoft account to complete setup. If you need to bypass this, press Shift + F10 during setup to open Command Prompt and type: OOBE\BYPASSNRO and press Enter. Your PC will restart and give you a No internet option during setup.
Once your upgrade or clean install is complete, here are the important steps to take right away.
Check Windows Activation: Go to Settings, then System, then Activation. It should say Windows is activated. If it is not, click Troubleshoot and follow the prompts. Make sure you are connected to the internet and signed in with your Microsoft account.
Run Windows Update: Go to Settings, then Windows Update, and click Check for updates. Install all available updates to get the latest security patches and driver updates. Be aware of known bug reports for updates like Windows 11 KB5077181 before installing.
Update Your Drivers: Visit your PC manufacturer's website or your graphics card manufacturer's website (Nvidia, AMD, or Intel) and download the latest drivers for Windows 11. Outdated drivers are one of the most common causes of problems after upgrading.
Set Up Windows Security: Windows 11 comes with Windows Security built in. Open it from the Start menu and make sure all protection features are enabled including virus protection, firewall, and device security.
Restore Your Files: If you did a clean install using the Windows 11 ISO, now is the time to restore your backed-up files from your external drive or cloud storage.
Customize Your Settings: Explore the new Settings app in Windows 11. You can personalize your Start menu, taskbar, and theme. Windows 11 Pro users can also set up BitLocker encryption and Remote Desktop from this menu.
Check the Microsoft Store: Open the Microsoft Store and update all your apps. Windows 11 supports a wider range of apps than previous versions, including Android apps through the Amazon Appstore in supported regions.
Is upgrading to Windows 11 free?
Yes. If you are running genuine Windows 10 on a compatible PC, the upgrade to Windows 11 is completely free. Your existing Windows 10 license covers Windows 11 and you do not need to purchase or enter a new Windows 11 key.
If you upgrade through Windows Update, the Installation Assistant, or the Windows 11 Media Creation Tool using the upgrade option, all your files, apps, and settings are kept. If you do a clean install using the Windows 11 ISO, your drive is wiped and you start fresh.
Yes, but only within 10 days of upgrading. Go to Settings, then System, then Recovery, and click Go back. After 10 days, the option disappears and you would need to do a clean install of Windows 10 using its own ISO or media creation tool.
The upgrade typically takes between 30 minutes and 2 hours depending on your internet speed and PC performance. Your computer will restart multiple times during the process. Do not turn it off manually.
Both methods work fine. Windows Update is the easiest option for most users. The Windows 11 Media Creation Tool is better if you want to create a bootable USB to install on multiple PCs or if Windows Update is not yet offering the upgrade on your device.
You can download the official Windows 11 ISO directly from Microsoft at microsoft.com/en-us/software-download/windows11. Avoid downloading Windows 11 ISO files from unofficial or third-party websites as they may contain modified or unsafe versions.
Upgrading keeps your existing files, apps, and settings and simply replaces the operating system underneath. A clean install using the Windows 11 ISO erases everything and installs a brand new copy of Windows 11. A clean install is generally faster and more stable long term but requires you to reinstall all your software and restore your files.
Yes. If you upgrade from Windows 10 Pro, all Windows 11 Pro features including BitLocker, Remote Desktop, and Hyper-V will be available after the upgrade with no need to purchase a new Windows 11 key.
Upgrading to Windows 11 is a straightforward process when you know the right method to use. For most users in the USA and Canada, the Windows Update or Installation Assistant approach is the easiest and safest route. If you prefer a fresh start, the Windows 11 ISO download combined with the Windows 11 Media Creation Tool gives you full control over the installation.
No matter which method you choose, make sure your PC meets the hardware requirements, back up your files before you start, and ensure you have a valid Windows 11 key or a genuine Windows 10 license for automatic activation.
Windows 11 is a significant improvement over Windows 10 with better performance, a cleaner interface, improved security, and new productivity features. Whether you are upgrading to Windows 11 Home for everyday use or Windows 11 Pro for work and business, the process is well worth it.
If you run into issues during the upgrade, especially bugs related to Windows 11 KB5077181 or update rollbacks, refer to the troubleshooting section above or visit the official Microsoft support website for the latest guidance.
Last updated: June 2026. Compatible with all Windows 11 versions including 23H2 and 24H2.